
In this guide you will create a water moisture level monitoring sensor using ESP32 Dev module. The values of water level will be sent to a web application, it’s access and setup will be explained step by step using screenshots and understandable instructions. At the end of this tutorial you can easily check and reset your water moisture level sensor on your mobile phone from anywhere anytime.
Project Overview
In this project you will create a water moisture level sensor for your hydroponic garden plants using simple over the counter hardware. After setup this tutorial will teach you to create a mobile application to access the information of your sensor, its status and values. By the end of this tutorial you will be hands on creating multiple sensors and their monitoring along with changing basic preferences and fonts and other settings easily by just a few clicks.
Prerequisites
Before starting to create the water moisture level sensor and application you need to check the following prerequisites
Used Software
- Arduino
- blynk Cloud
- Secure and stable internet connection
Hardware Component List
| No | Name | Quantity | Link |
| 1 | ESP32 Dev Module | 1 | https://www.amazon.com/HiLetgo-ESP-WROOM-32-Development-Microcontroller-Integrated/dp/B0718T232Z |
| 2 | Moisture sensor | 1 | https://www.amazon.com/Stemedu-Capacitive-Corrosion-Resistant-Electronic/dp/B0BTHL6M19 |
| 3 | USB Cable | 1 | https://www.amazon.com/Controller-Charger-Durable-Android-Charging/dp/B01GEDOPR0/ |
| 4 | Connecting Wires | 1 pack | https://www.amazon.com/Elegoo-EL-CP-004-Multicolored-Breadboard-arduino/dp/B01EV70C78 |
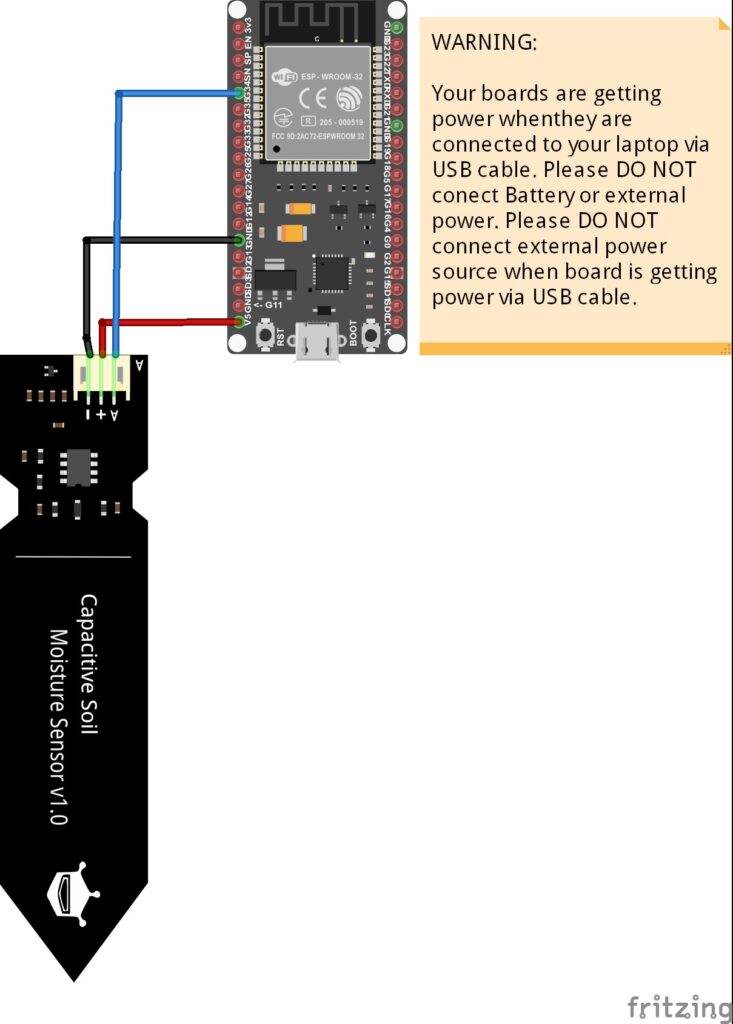
1. Schematics
The following diagram shows a overview of the project we will build-programming the ESP32 Dev and setting up of the Arduino will be explained under.
2. Instructions for setup
- Install Arduino IDE ” https://www.arduino.cc/en/software “
- Install ESP32 board support in your Arduino IDE
- Launch the Arduino IDE and navigate to File > Preferences.
- Within the “Additional Board Manager URLs” field, input the following URL: https://raw.githubusercontent.com/espressif/arduino-esp32/gh-pages/package_esp32_index.json.
- Confirm your input by clicking the “OK” button.
- Access the Boards Manager by going to Tools > Board > Boards Manager.
- Utilize the search function to locate the ESP32 board, then click the “Install” button corresponding to “ESP32 by Espressif Systems.”
- Allow a few moments for the installation process to complete.
- If you are a Windows user, it’s essential to also install the CP2102 drivers, which can be obtained from this link. https://www.silabs.com/developers/usb-to-uart-bridge-vcp-drivers
3. App Setup
Follow the next steps to setup your water level sensing application using blynk cloud
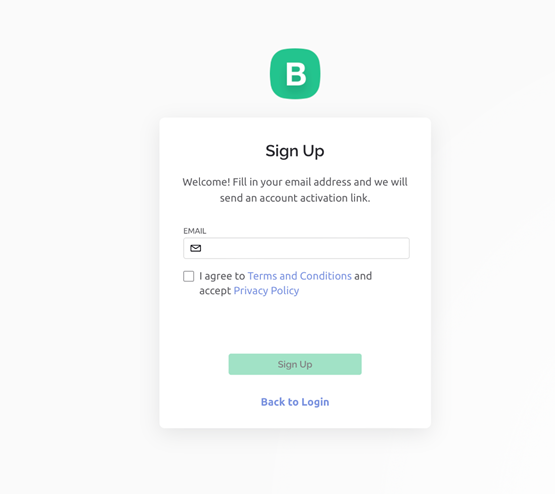
a. Go to blynk Cloud : https://blynk.cloud/dashboard/login
Signup on blynk cloud
b. Install the blynk cloud app on your phone from android studio or app store.
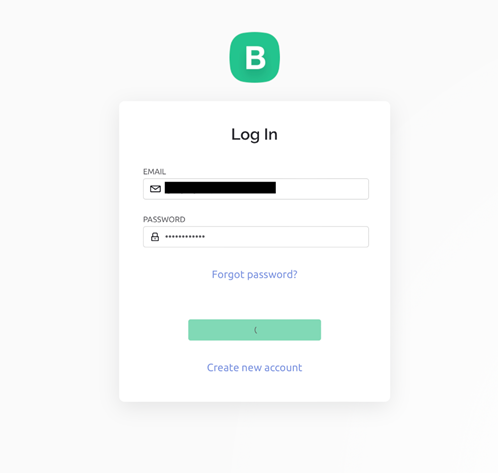
c. Blynk will send confirmation email on your email, verify that email and set password.
d. After that login on blynk cloud.
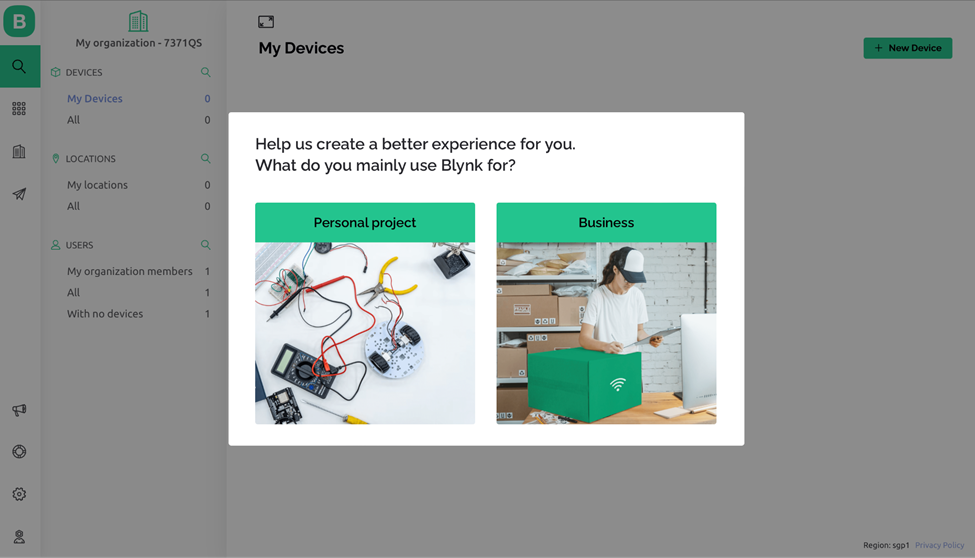
e. Select personal project.
f. Click on New Template.
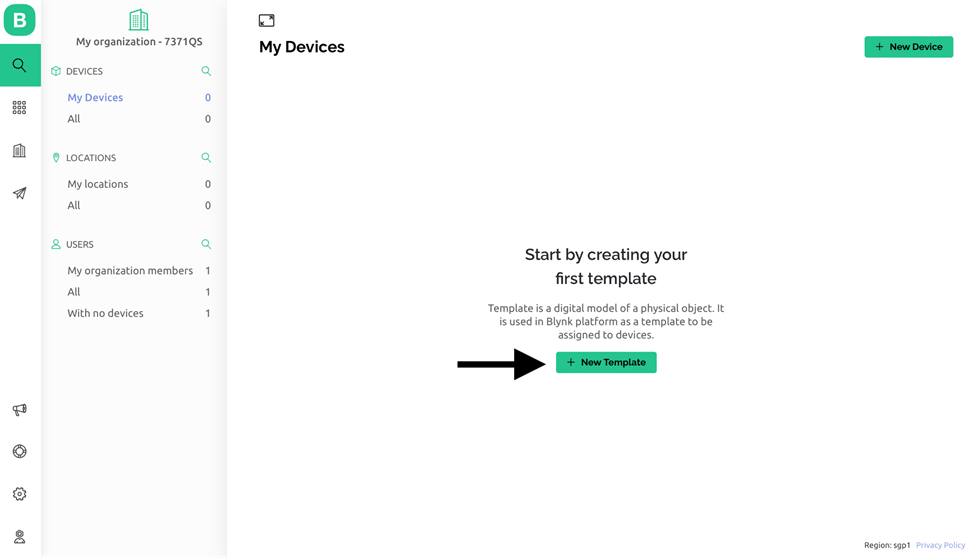
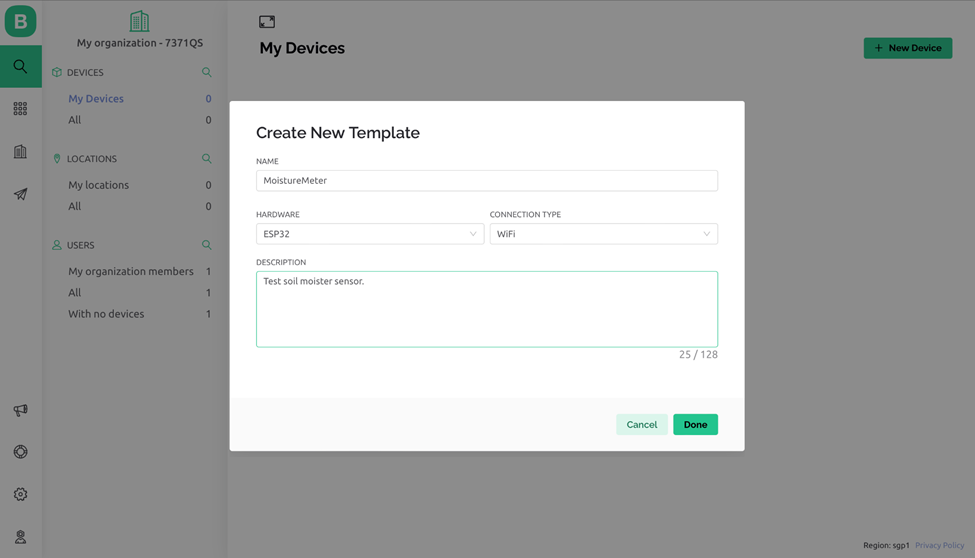
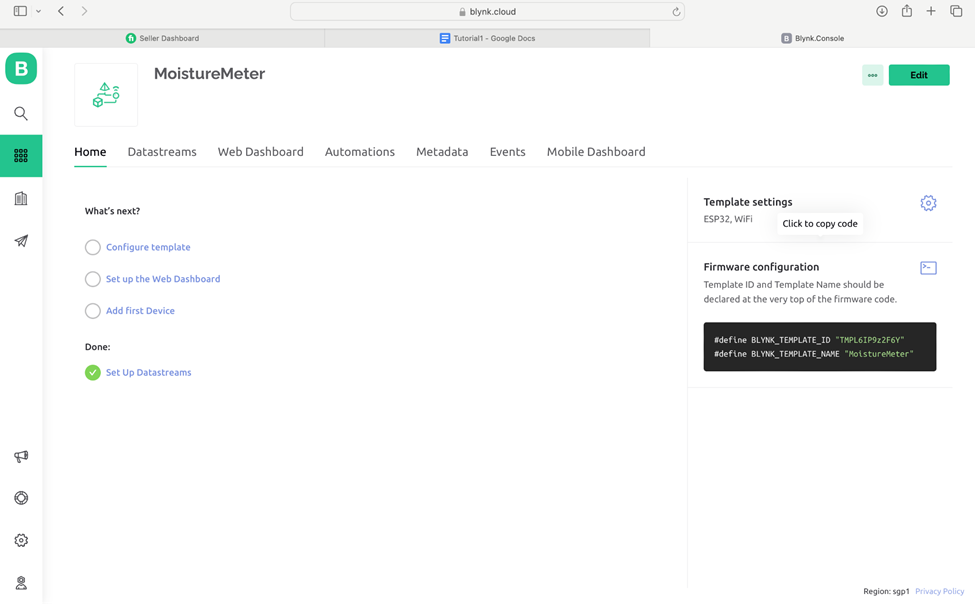
g. A new pop-up window will appear, name the project as you wish, in this case I am naming it as Moisture meter. Once done with name select Hardware as ESP32 and Connection Type as WiFi and then click Done.
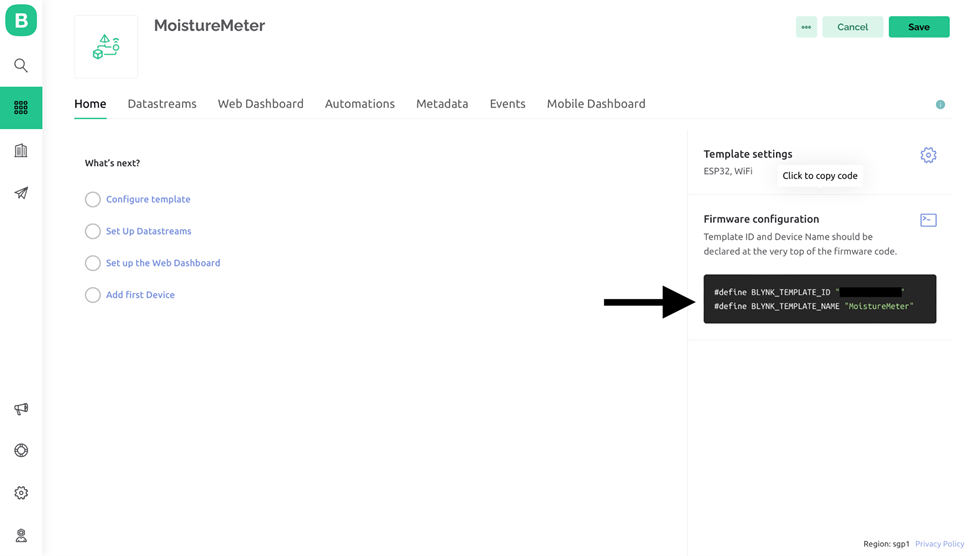
h. Save the Blynk template id and template name from side and note it down for future use.
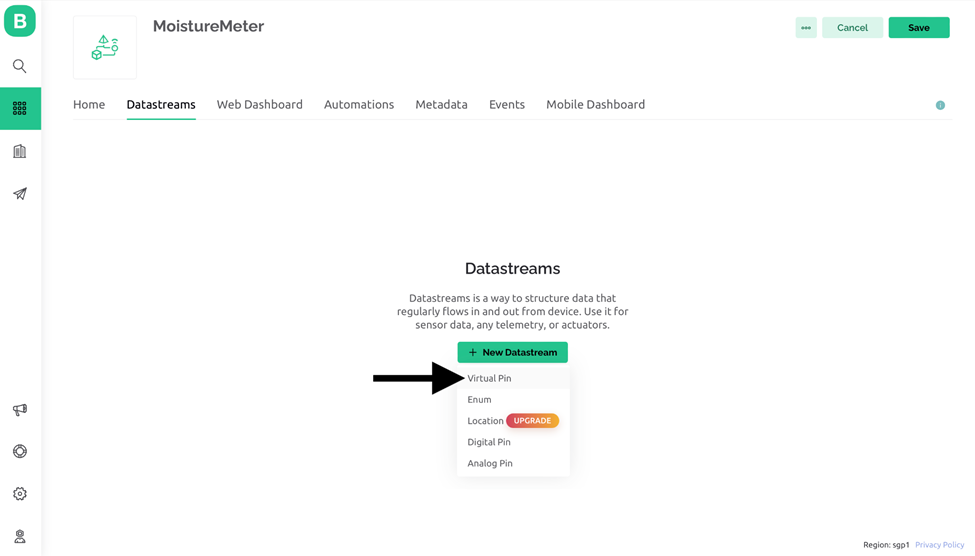
i. Then click on setup data stream and then click New Data stream then select Virtual Pin.
j. Set the name and max value of the field and then click create.
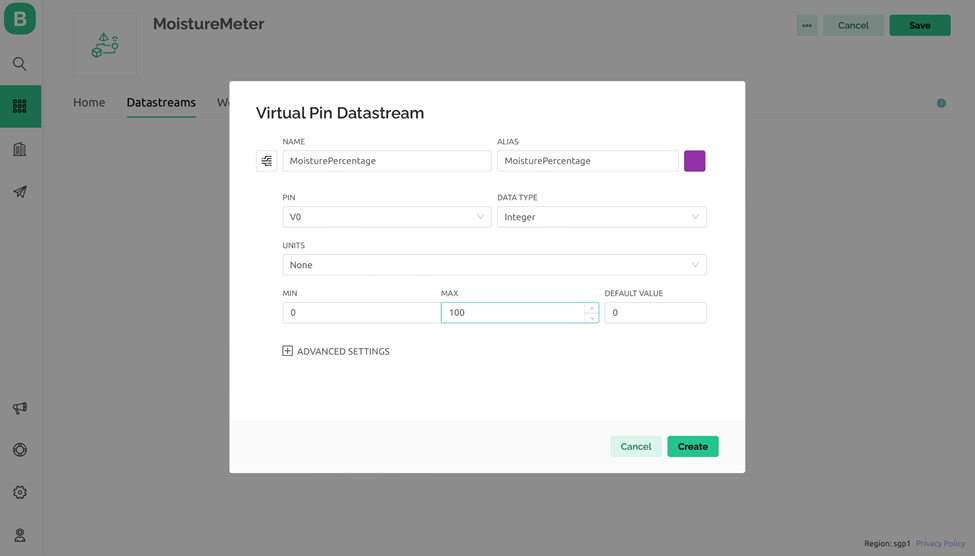
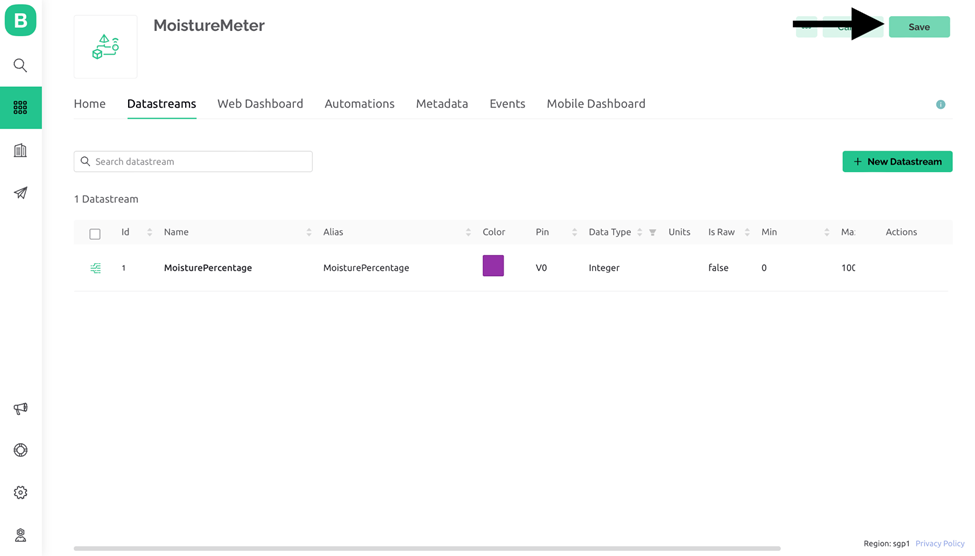
k. Then click save.
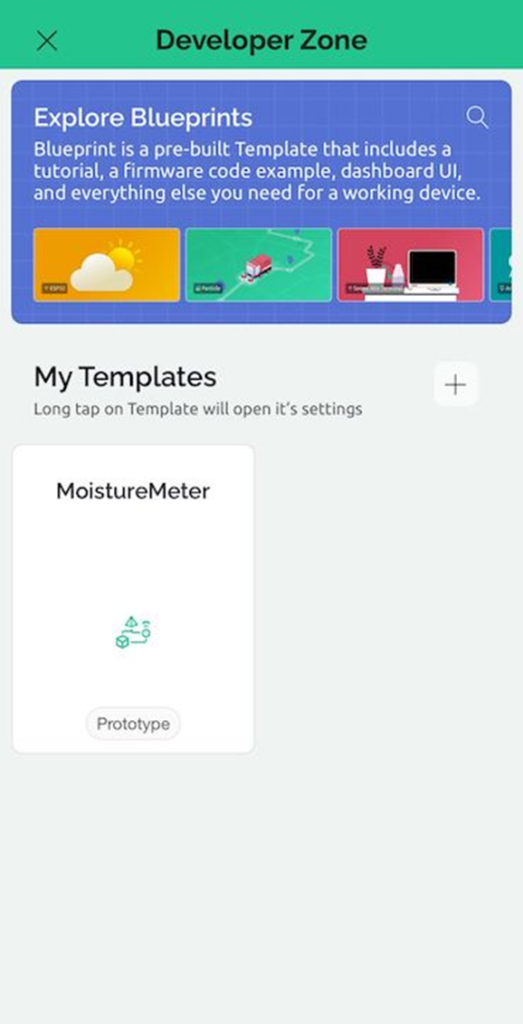
l. On the blynk cloud app go to the developer zone.
m. Click on moisture meter.
n. A blank canvas will open.
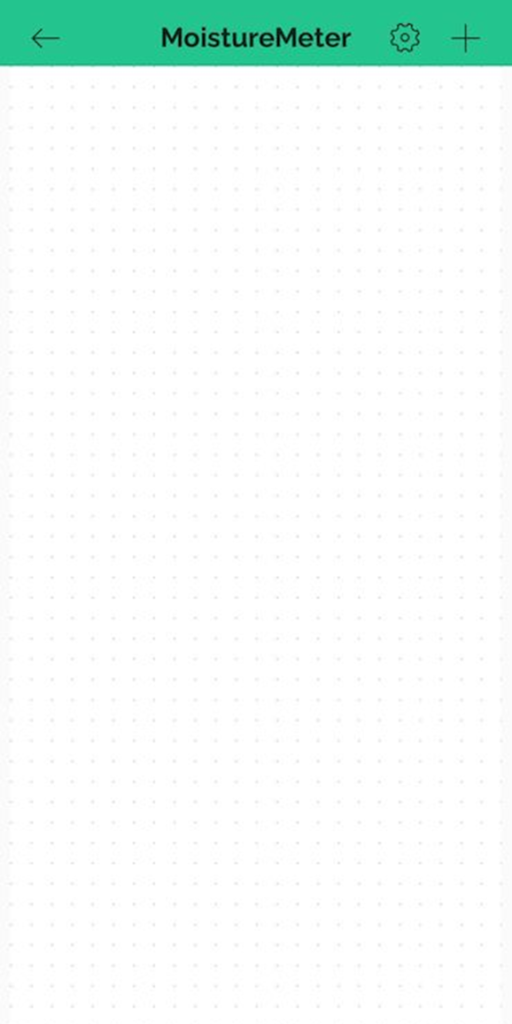
o. Tap on the side of screen and select Labeled Value display.
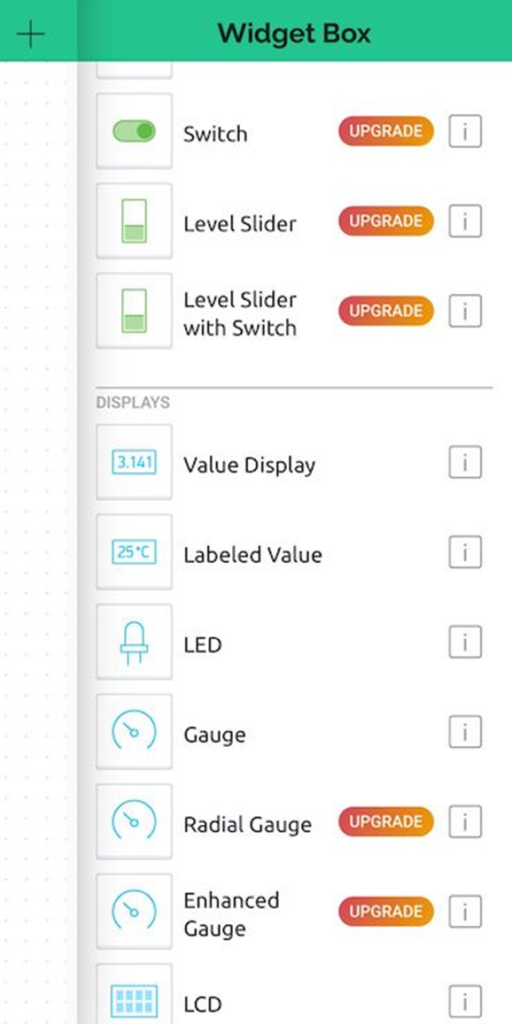
p. Drag it to the center of the screen or wherever you prefer.
q. Click on the label.
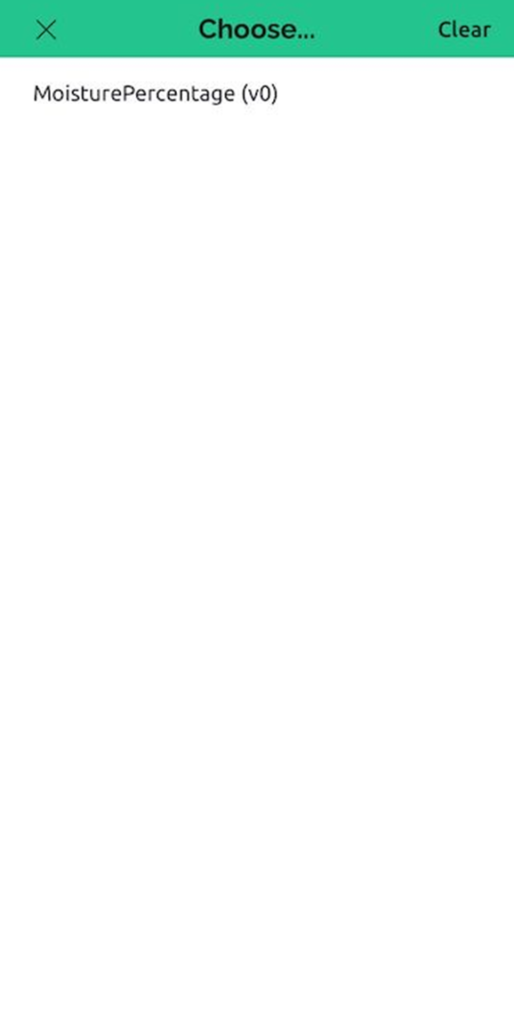
r. Select the data stream we have created in step j.
s. Go back from developer zone and follow the next section.
4. Setup Code
Now you have successfully created the application on blynk cloud, follow the below steps to build up code in Arduino
a. Access the Library Manager by going to Arduino IDE > Sketch > Include library > Manage libraries
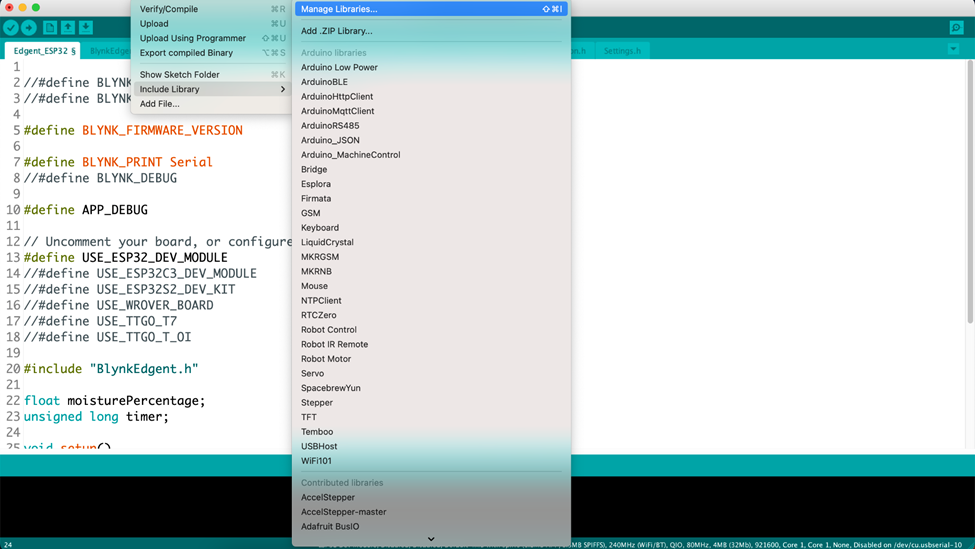
b. Utilize the search function to locate the blynk, then click the “Install” button corresponding to “ESP32 by Espressif Systems.”

c. Click on install and in few seconds library will be installed
d. In Arduino IDE > Go to file > Example > Blynk > Blynk Edgnet > Edgent_ESP32
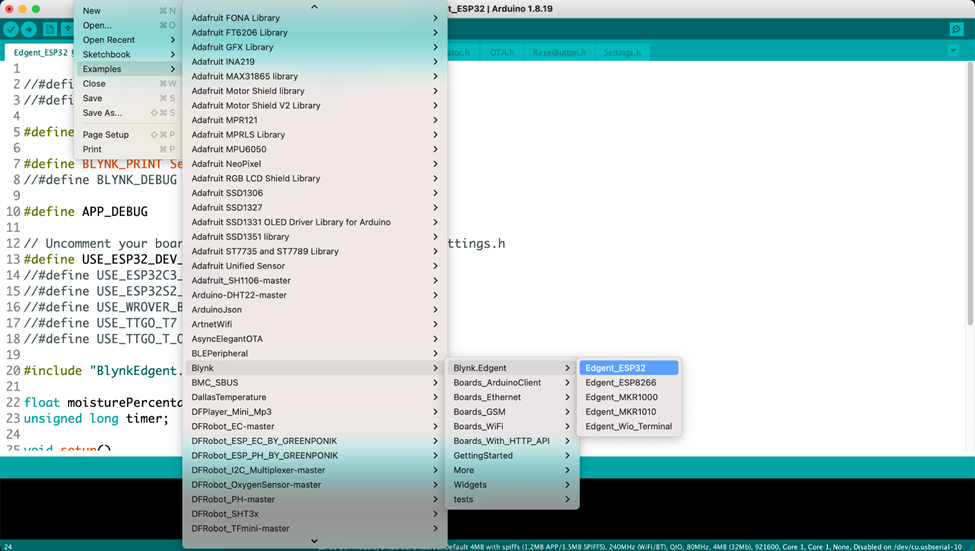
e. A file like this will open.
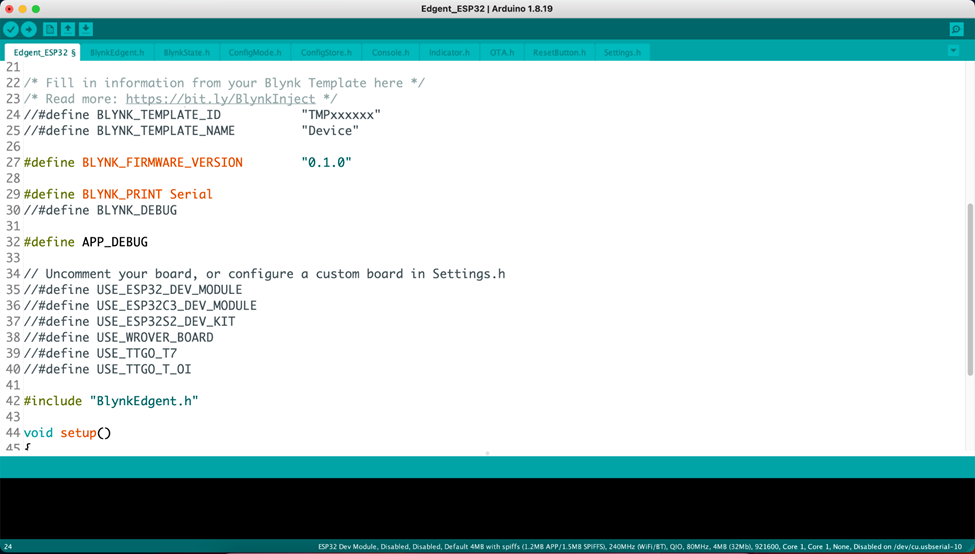
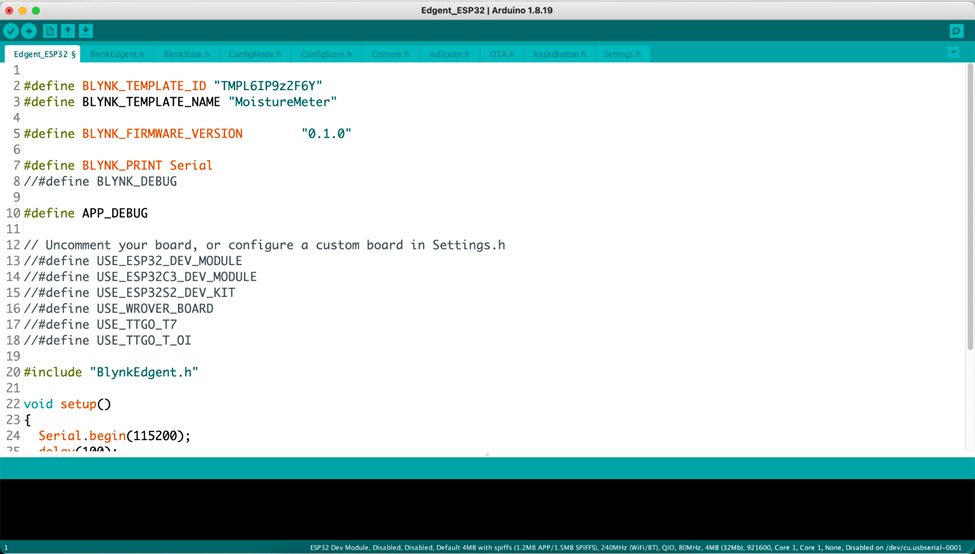
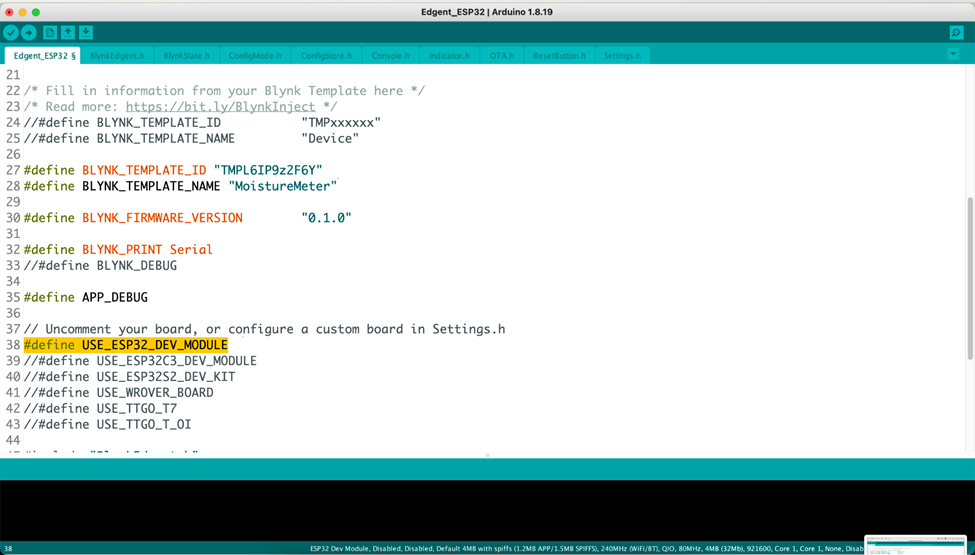
f. Add the blynk Template ID and Template name as screenshot below.
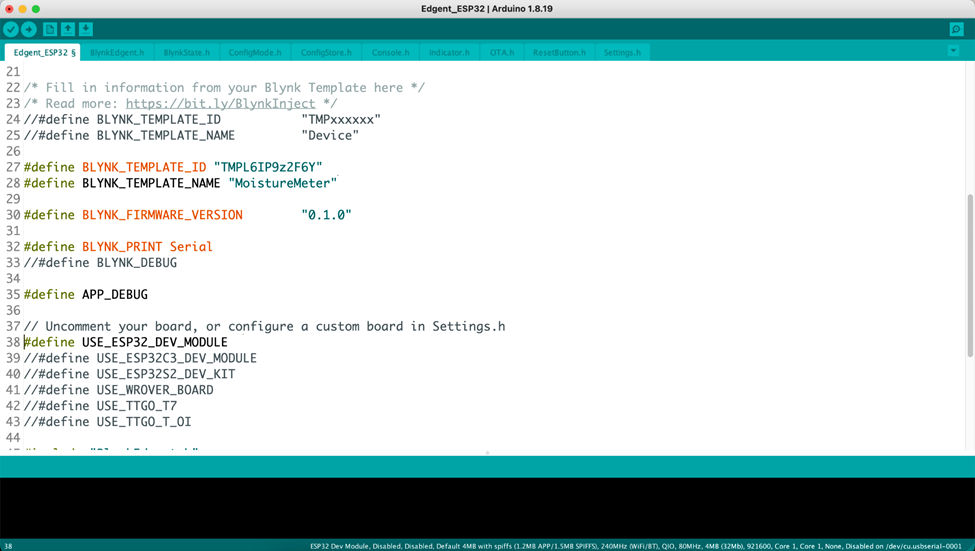
g. Change the line 38 like screenshot below.
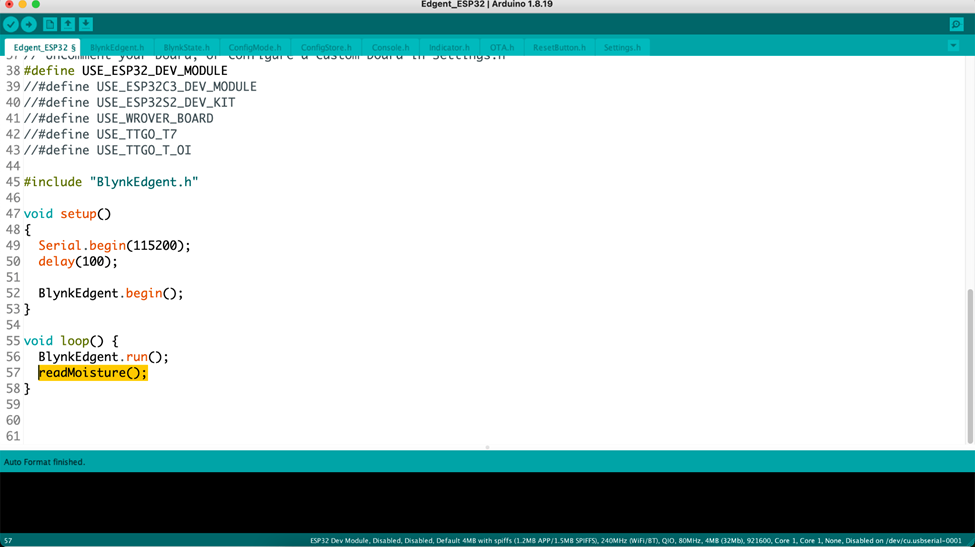
h. Add the readMoisture(); line in loop like the screenshot below.
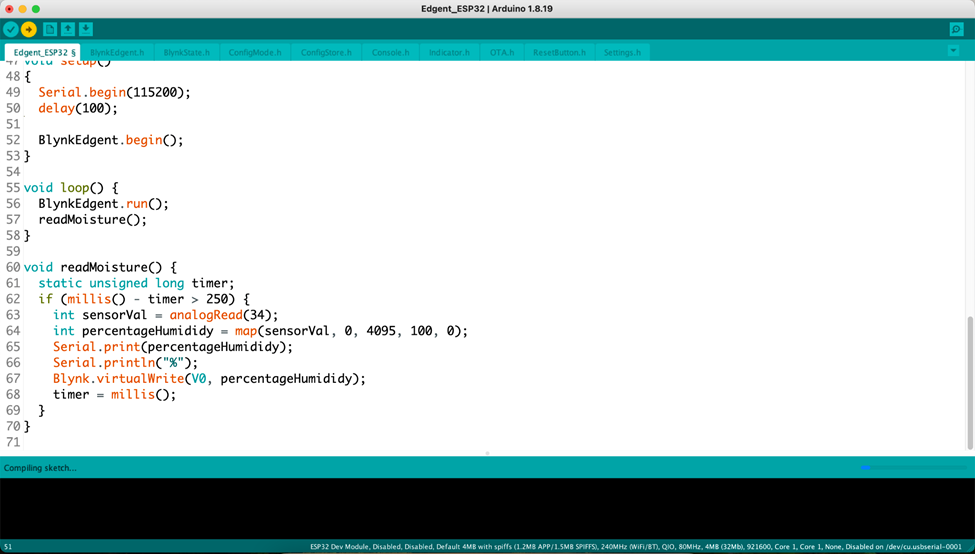
i. Add the following lines in the code.
| void readMoisture() { static unsigned long timer; if (millis() – timer > 250) { int sensorVal = analogRead(34); int percentageHumididy = map(sensorVal, 0, 4095, 100, 0); Serial.print(percentageHumididy); Serial.println(“%”); Blynk.virtualWrite(V0, percentageHumididy); timer = millis(); } } |

5. Instructions to test code
After setting up Arduino and Blynk cloud app now follow the simple instructions to run and test it.
a. Press the compile button to compile code
b. Connect your ESP32 with computer
c. Select the com port from Arduino IDE > Tools > Serial port

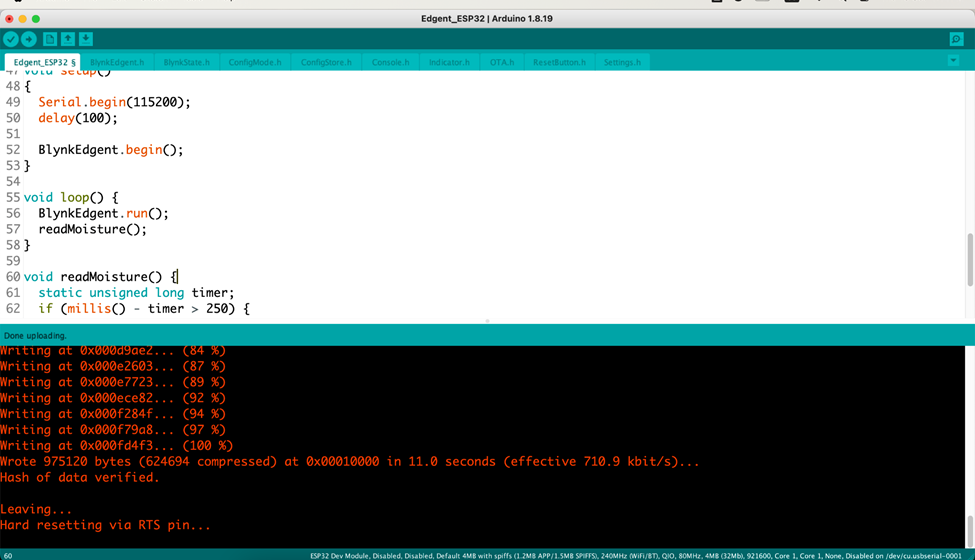
d. Press the upload button and code will first start compiling and then start uploading.
e. In some ESP board you need to press and hold the BOOT/IO button on ESP board when it says connecting.
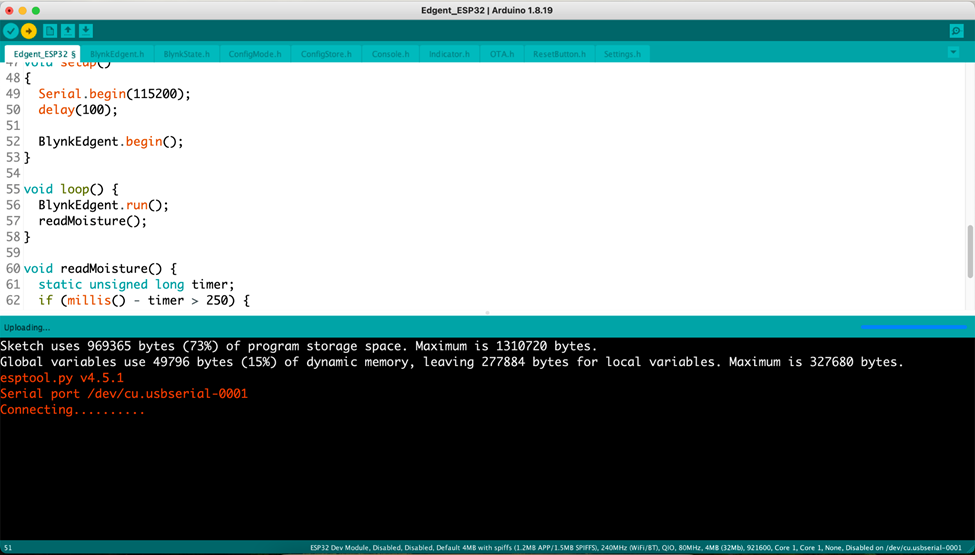
f. Code uploading is done.
6. Demonstration
Congratulations! You successfully deployed your app. Now its time to connect it and check the moisture level value. The web app is responsive, and you can access it using your smartphone, computer, or tablet.
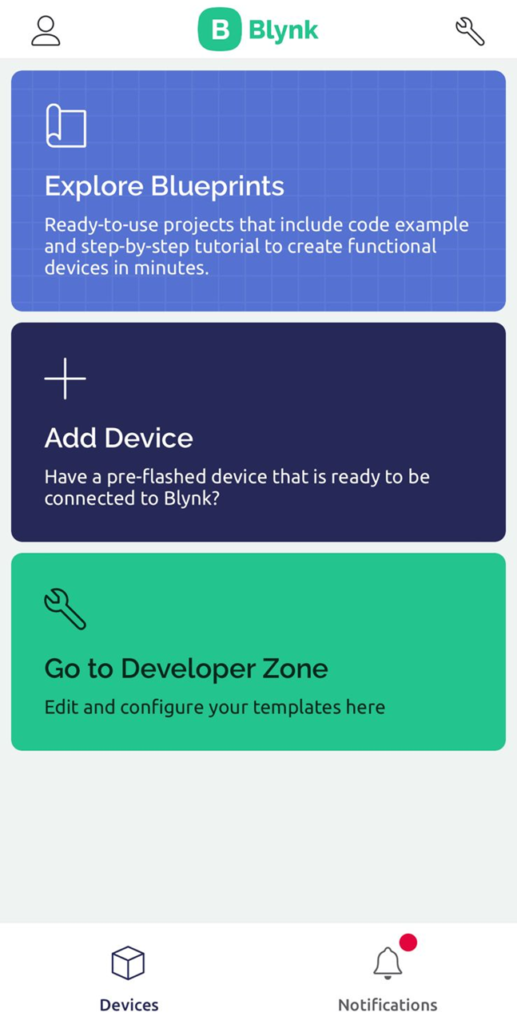
a. Open the blynk cloud app.
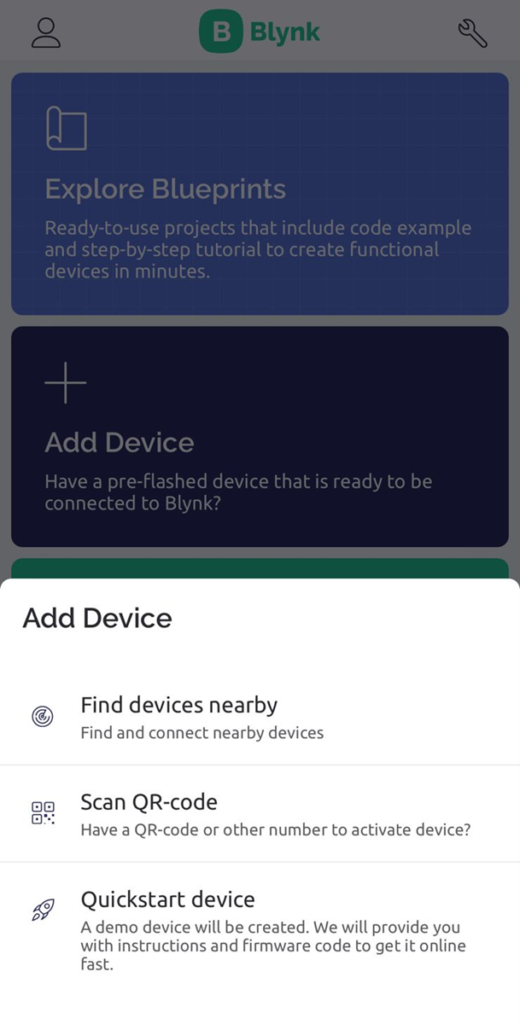
b. Click on add new device
c. Find nearby device
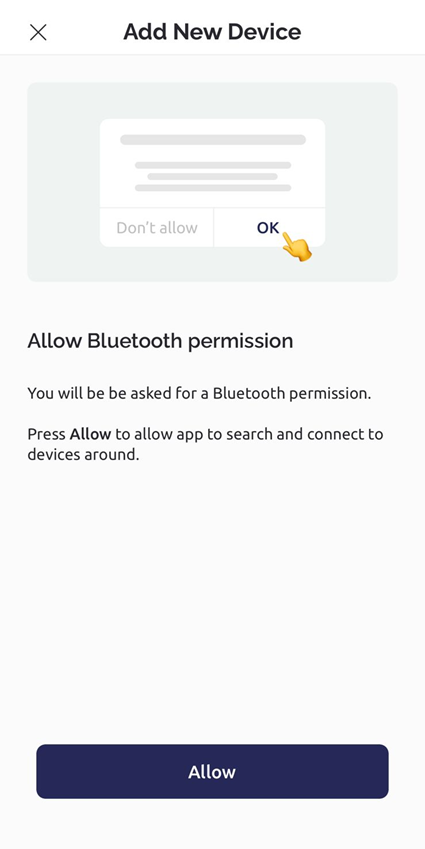
d. Allow the Bluetooth permission to blynk and turn ON Bluetooth
e. Start the scan

f. Blynk will find the moisture device, connect with it.
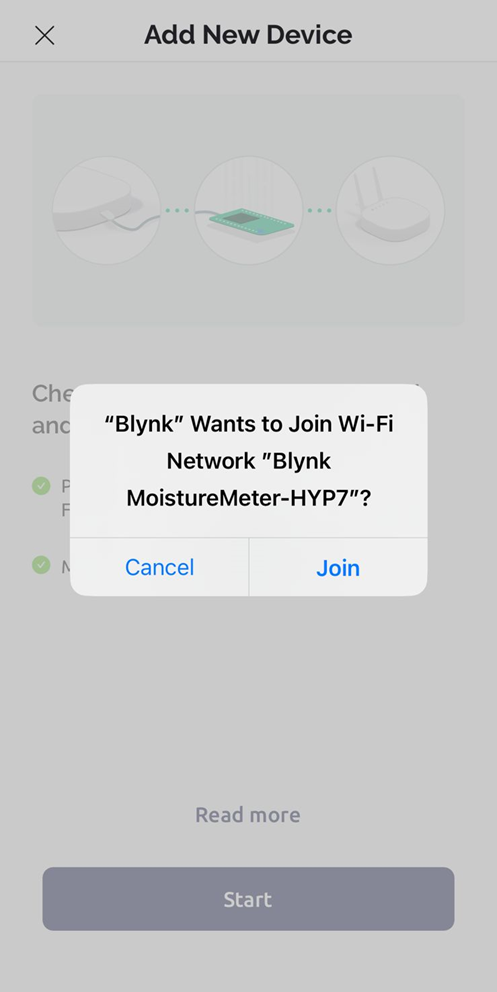
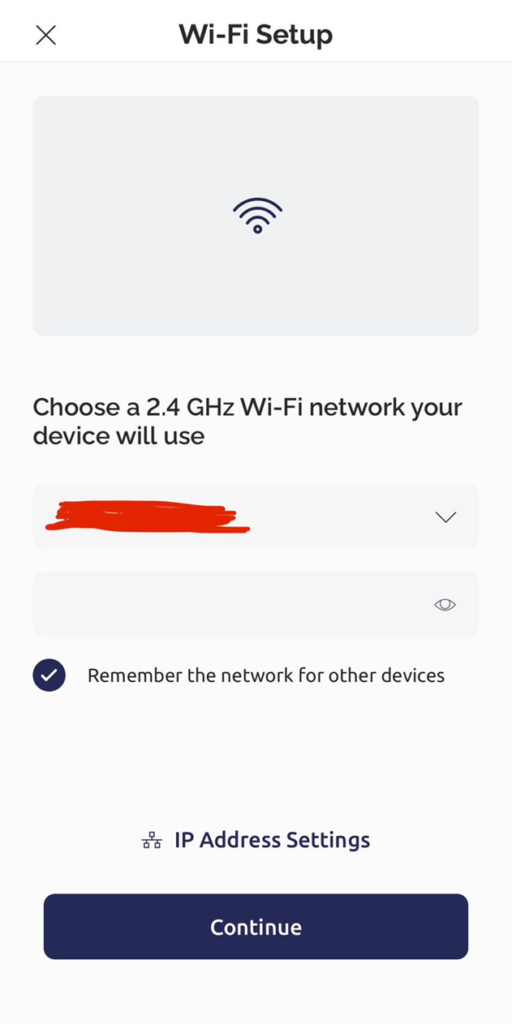
g. Add the wifi details and continue
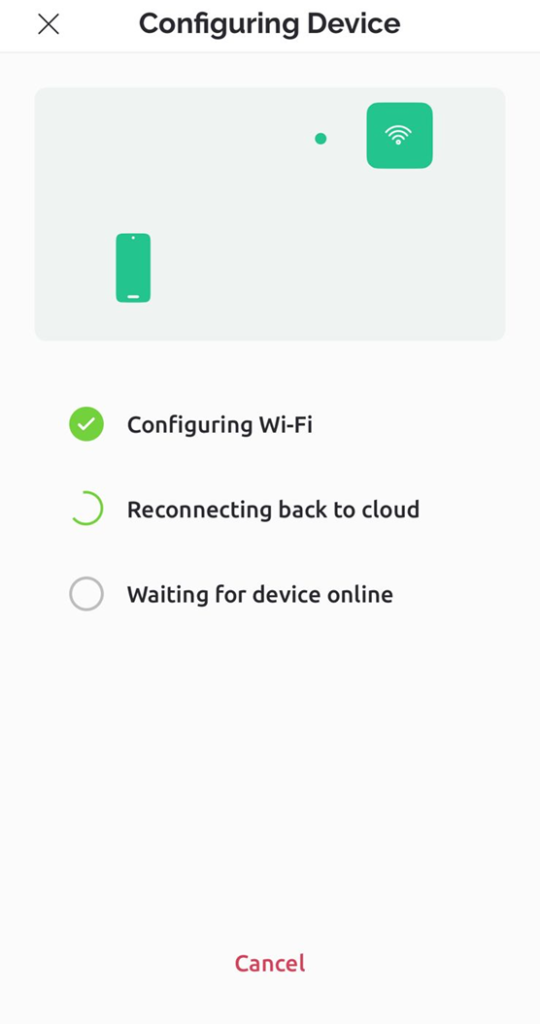
h. Blynk will start configuring
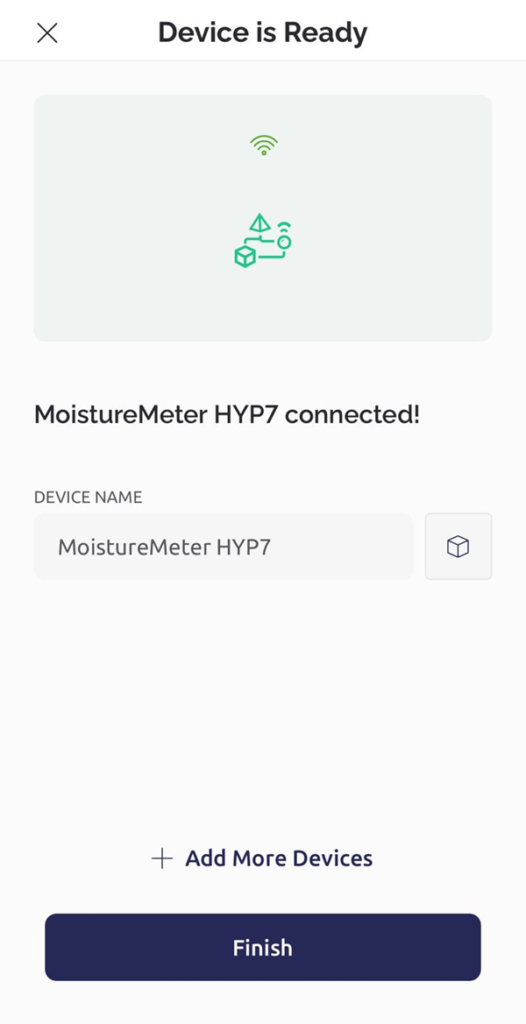
i. Click on finish
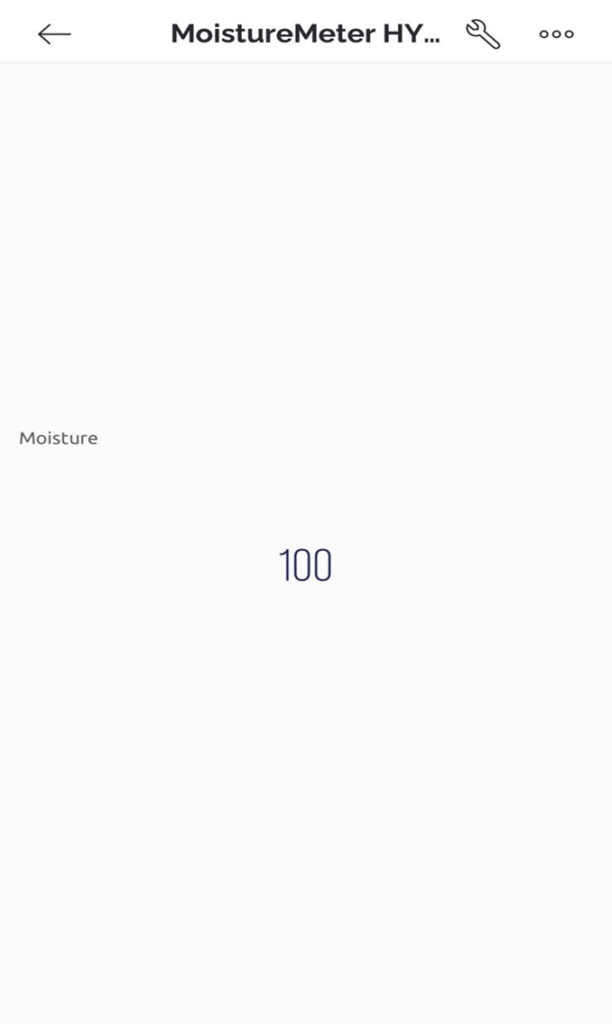
j. Moisture will start showing on screen.
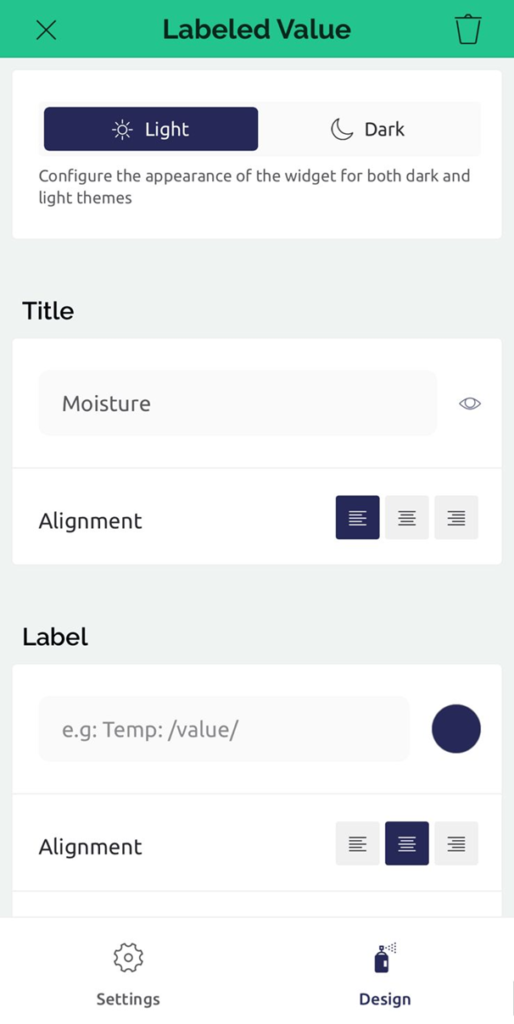
k. If you want to change the font and style of moisture display you can click on settings icon and then click on moisture label and then switch to design tab and edit the settings.
7. Project Conclusion
In this tutorial, you learned how to create a water moisture level sensor, both its hardware and software setup along with web application setup was provided with easy and understandable steps.
If you have any questions or need assistance at any step you can always reach us!
Thanks for reading. Happy smart gardening!